Want a fun, arty activity that also opens the door to lots of Easter learning?
With this Easter scene spinner, you can learn all about the important religious events at Easter without letting up on the fun factor. Watch the full video below, or follow our step-by-step guide.
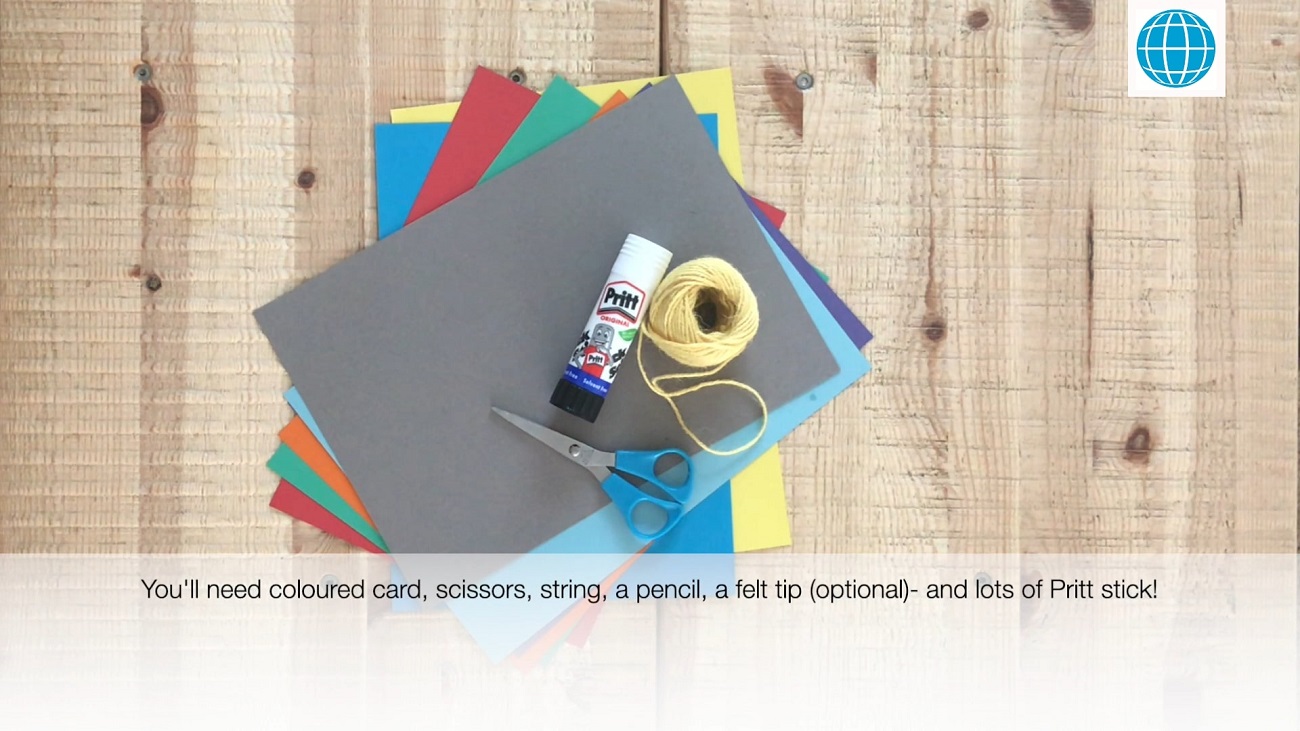
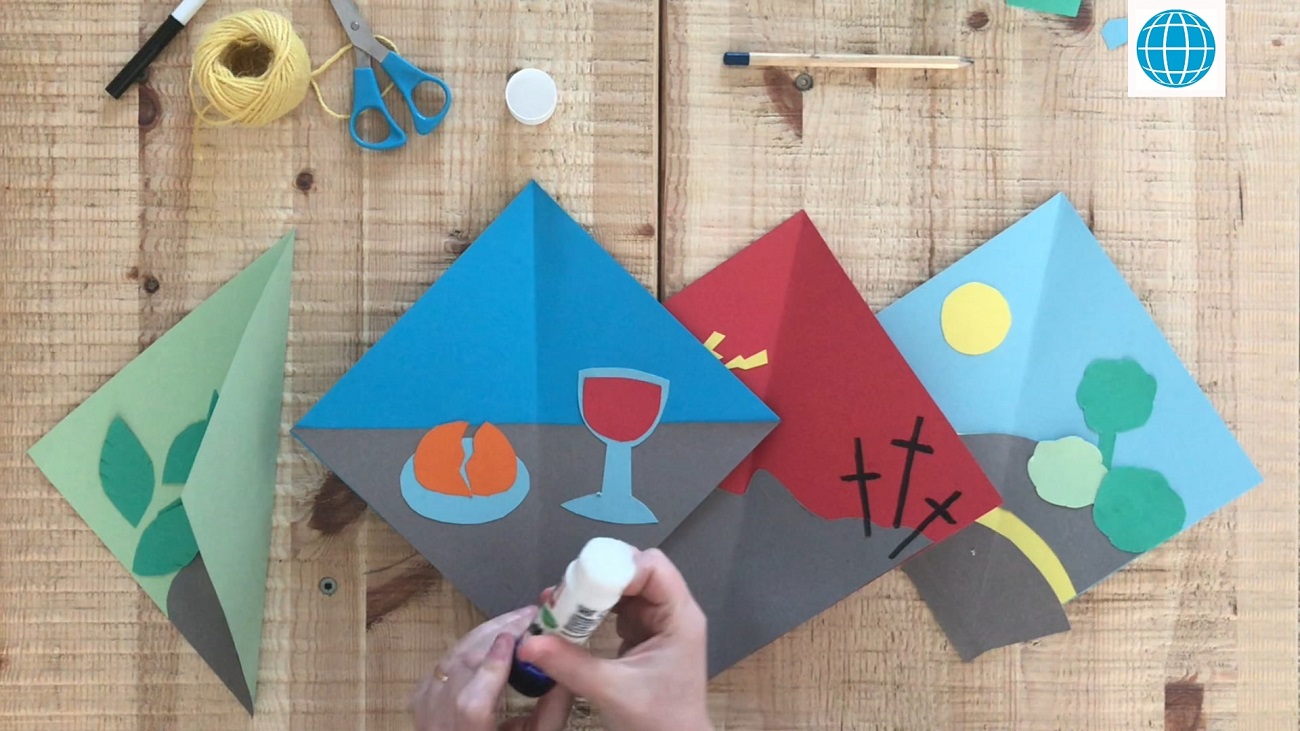
What you’ll need
Method
Step 1
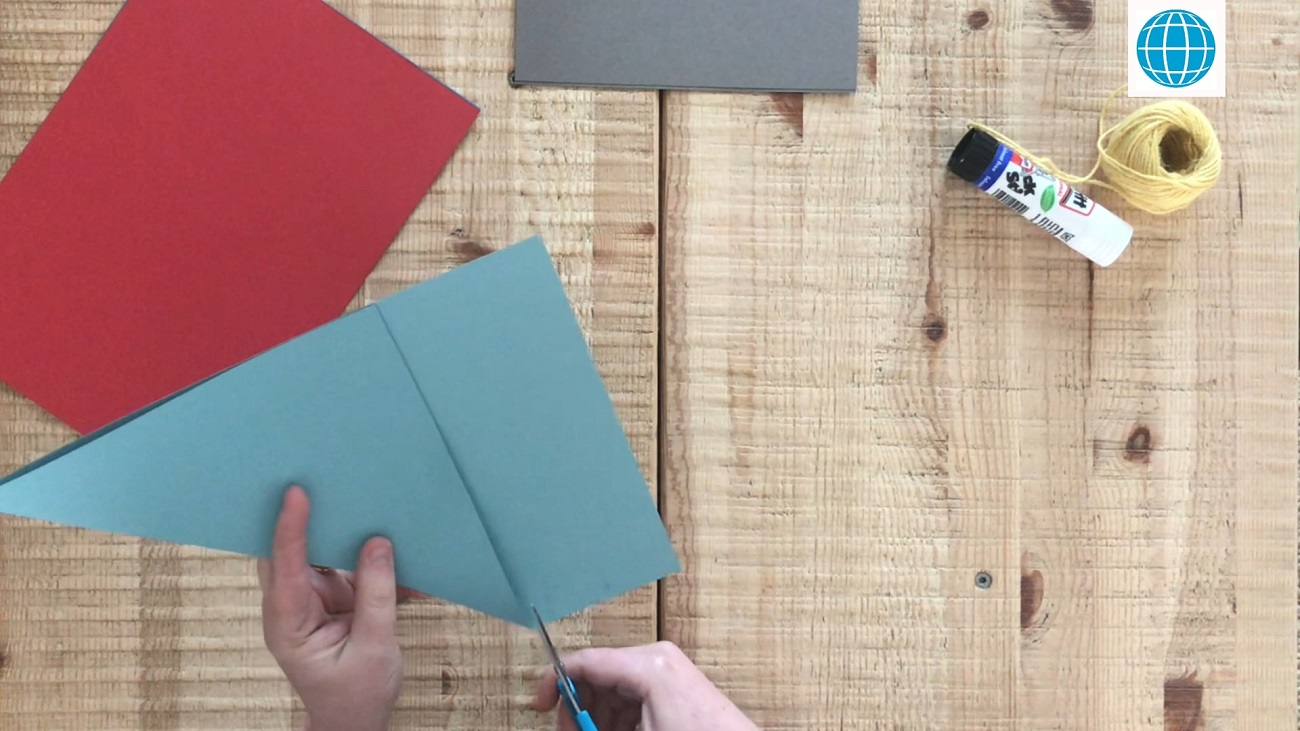
Choose a background colour for each of the four scenes, one piece of card for each. You’ll also need two sheets of neutral colour of your choice.
For each coloured background, fold the short edge of the card so that it meets the long edge. Then cut along the short edge. Repeat for all colours.
Step 2
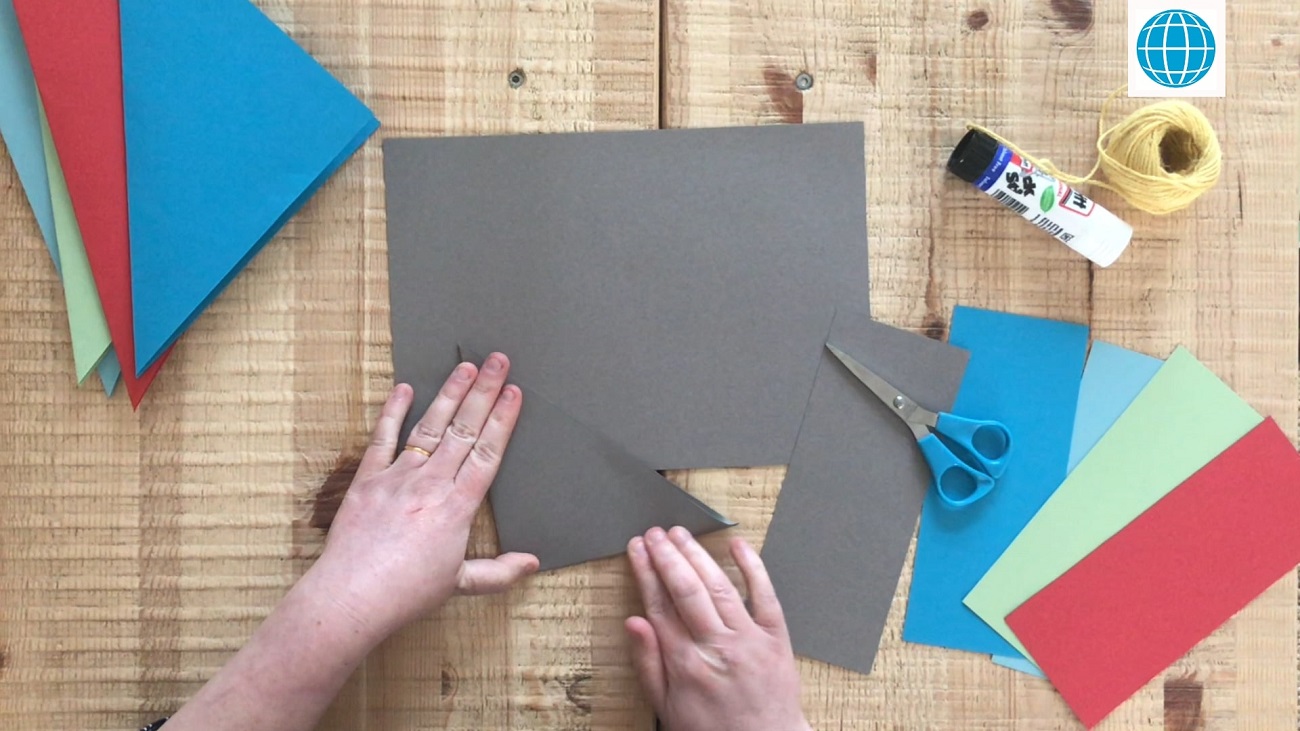
Do the same with the neutral colours, only this time fold them in half again, then cut in half down one of the folds to make triangles.
Step 3
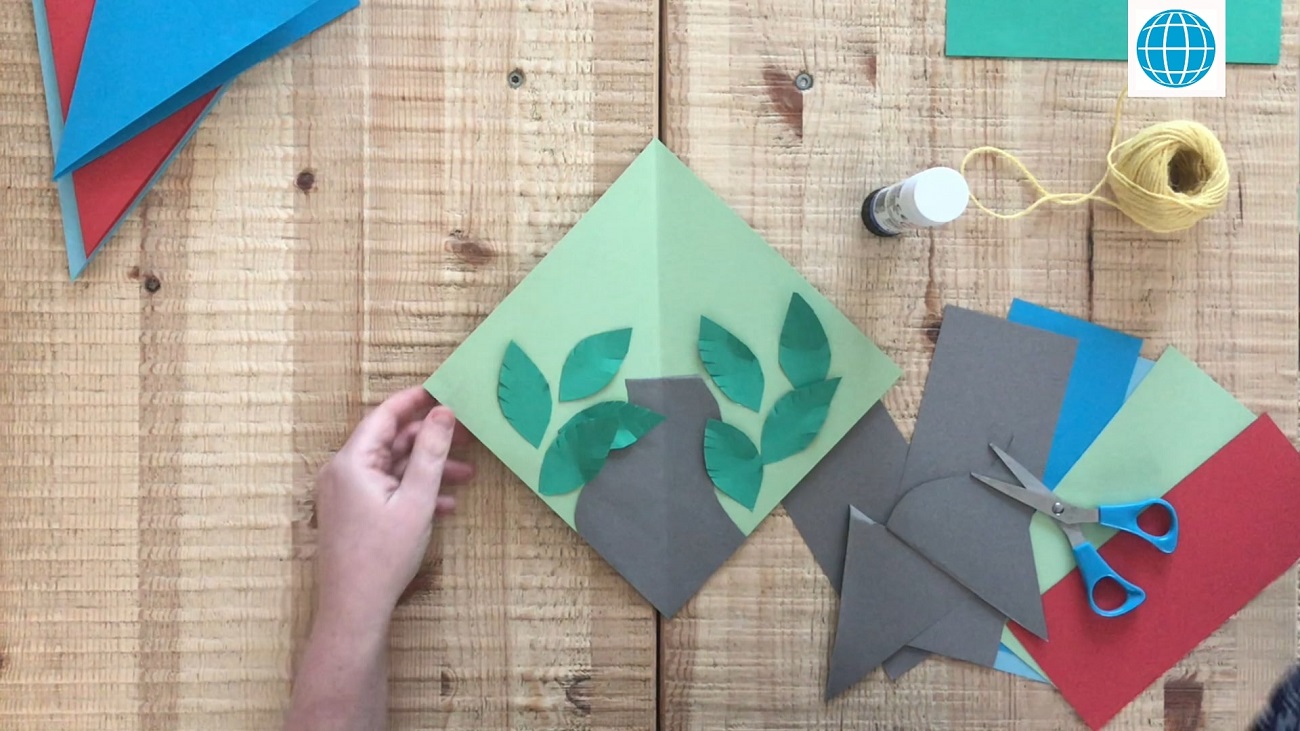
Now it’s time to make your first scene. We started with a Palm Sunday scene.
Using a different shade of green, cut out some leaves. Bend them to make them 3D. Then take a triangle of neutral card and cut a windy path shape.
Secure it all in place on the background card using plenty of Pritt stick.
Step 4
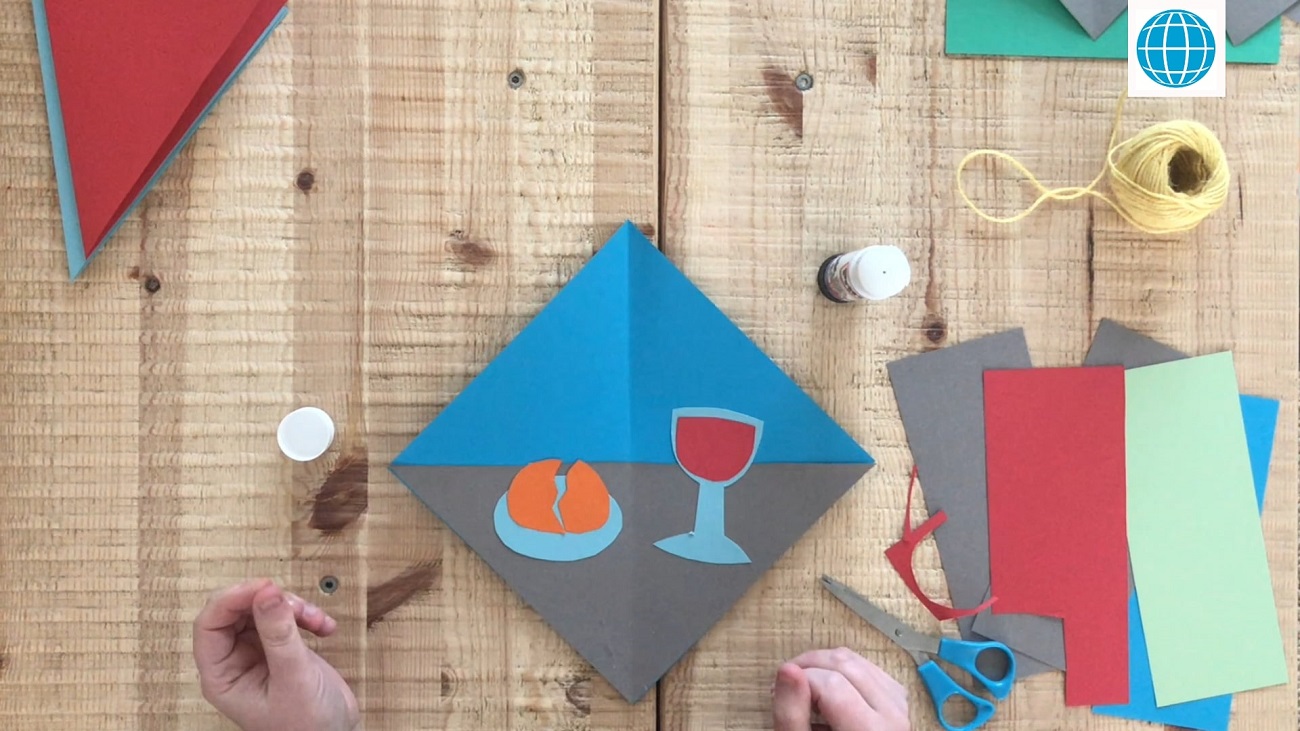
The next scene is The Last Supper.
Take another neutral triangle and stick if firmly to the background. Then, using an offcut, cut out a plate and a goblet shape and glue to the scene.
Next, cut out a loaf shape, cut it in half and stick it down on top of your plate. Follow that up with a red semi-circle that fits inside your goblet. This represents wine.
Step 5
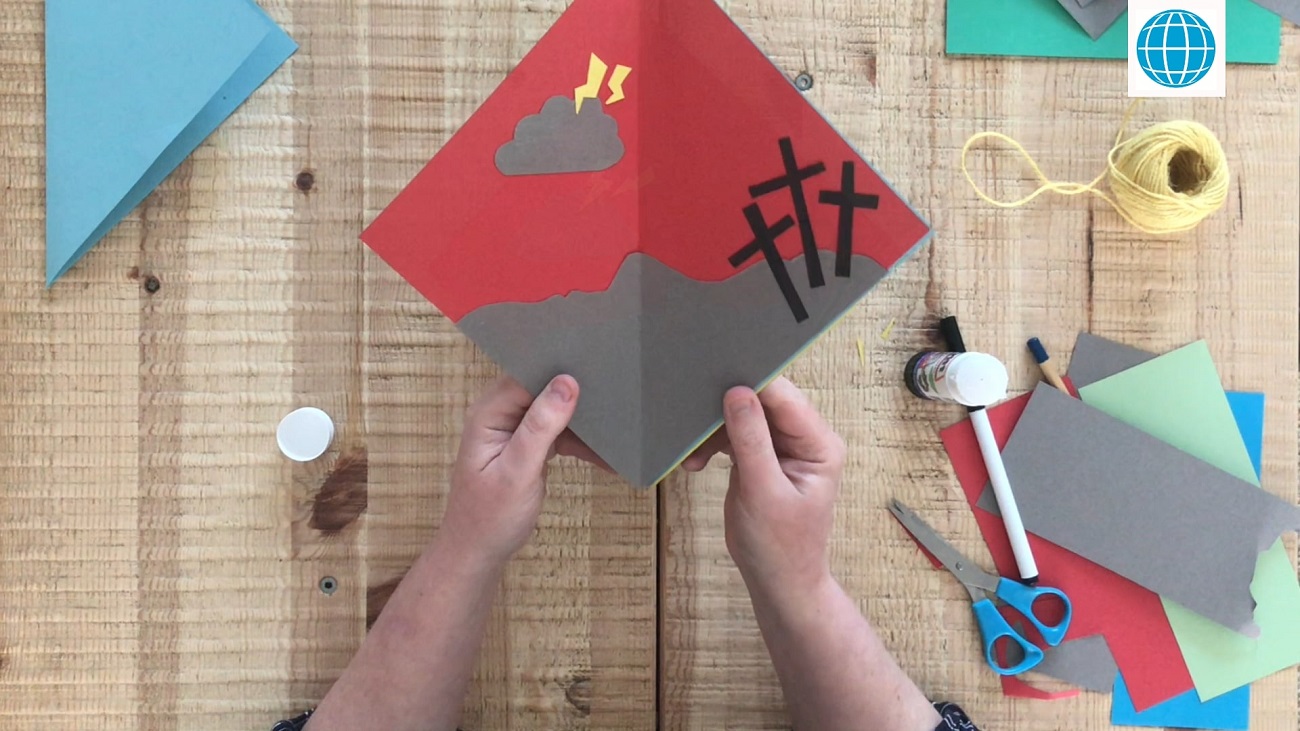
The third scene is Good Friday.
Take a neutral triangle and pencil. Draw the silhouette of a face in profile and cut it out. Get your Pritt stick back out and stick it down onto the background.
Take some yellow or gold card and cut out some bolts of lightening. Next, take an offcut of darker carder and use to cut out some heavy clouds. Stick it all down.
Now, using a black felt pen, draw three crosses into your scene. Be sure to place them at the top of the head silhouette – they represent a crown of thorns too.
Step 6
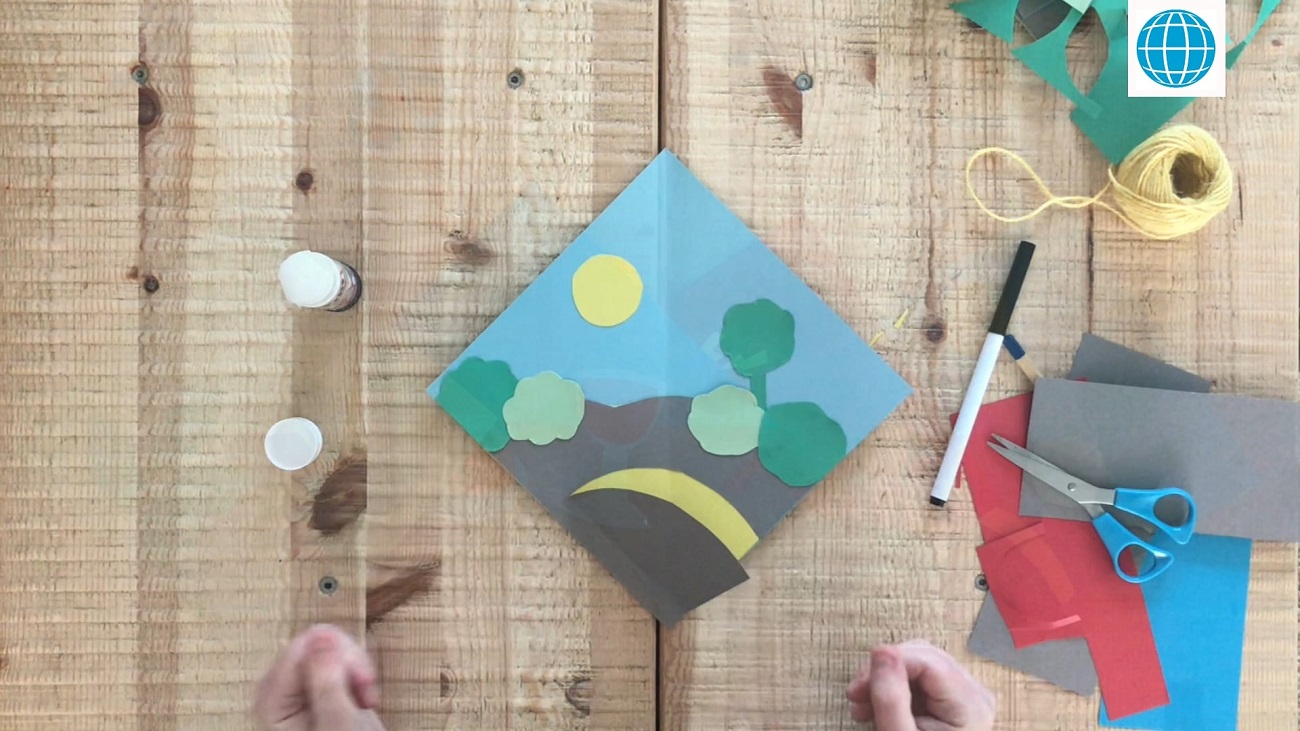
The final scene is Easter Sunday.
Take the final neutral triangle and cut some bumps into the top. Then, cut a large semi-circle from the bottom. Make sure you save the offcut – you’ll need it!
Find a piece of yellow, gold or white card and stick the arch you’ve just cut out onto it, fitting it to the corner. Then cut along the outside edge of the arch to make a new shape. This is your tomb. Using some offcut green from earlier, cut out some trees and bushes.
Stick your tomb, trees and bushes down onto the background.
Find that dark offcut from earlier. This is the entrance to your tomb. Position it over the top of the gold card and stick a section down. Once in place it should form a flap that can open and close the tomb.
For a finishing touch, why not stick a sun into the top corner?
Step 7
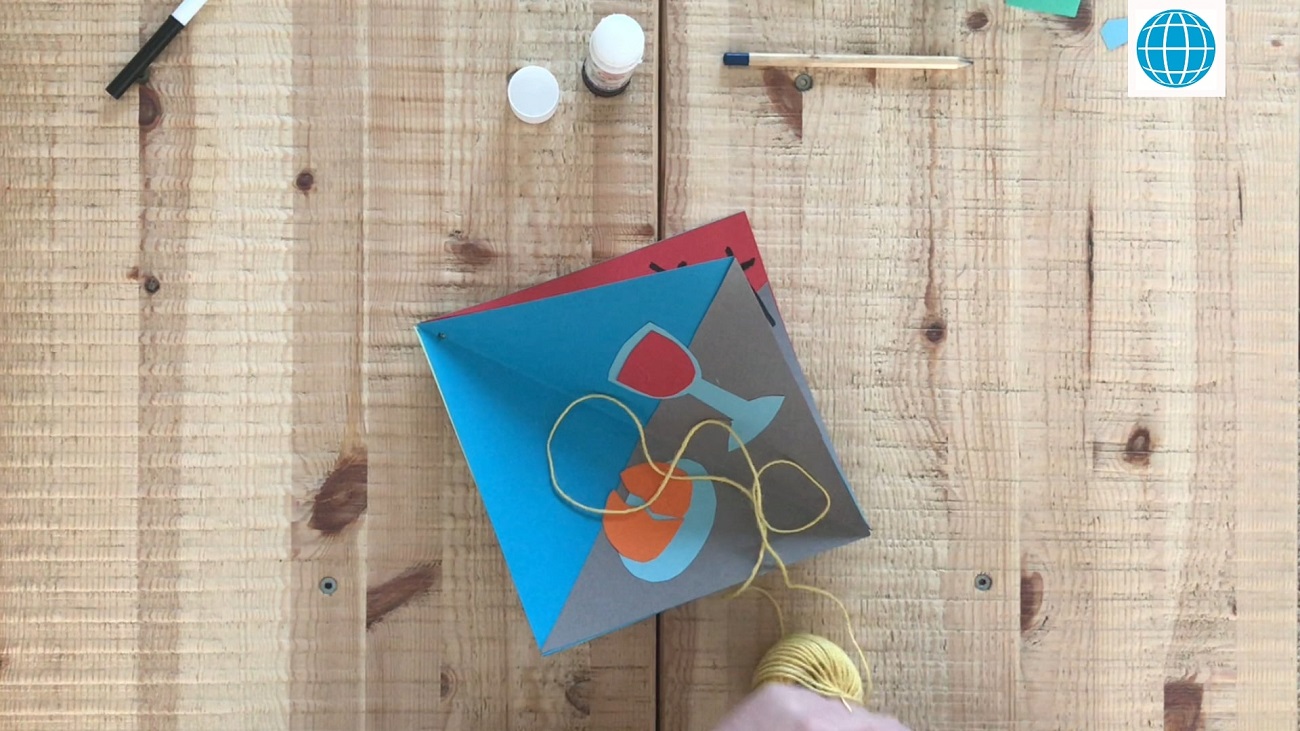
Put the scenes in the correct order. It is time to stick them together.
Step 8
Using a hole punch or scissors, put a hole in the top of the spinner. Thread some string through the hole.
Your Easter scene story spinner is now complete!