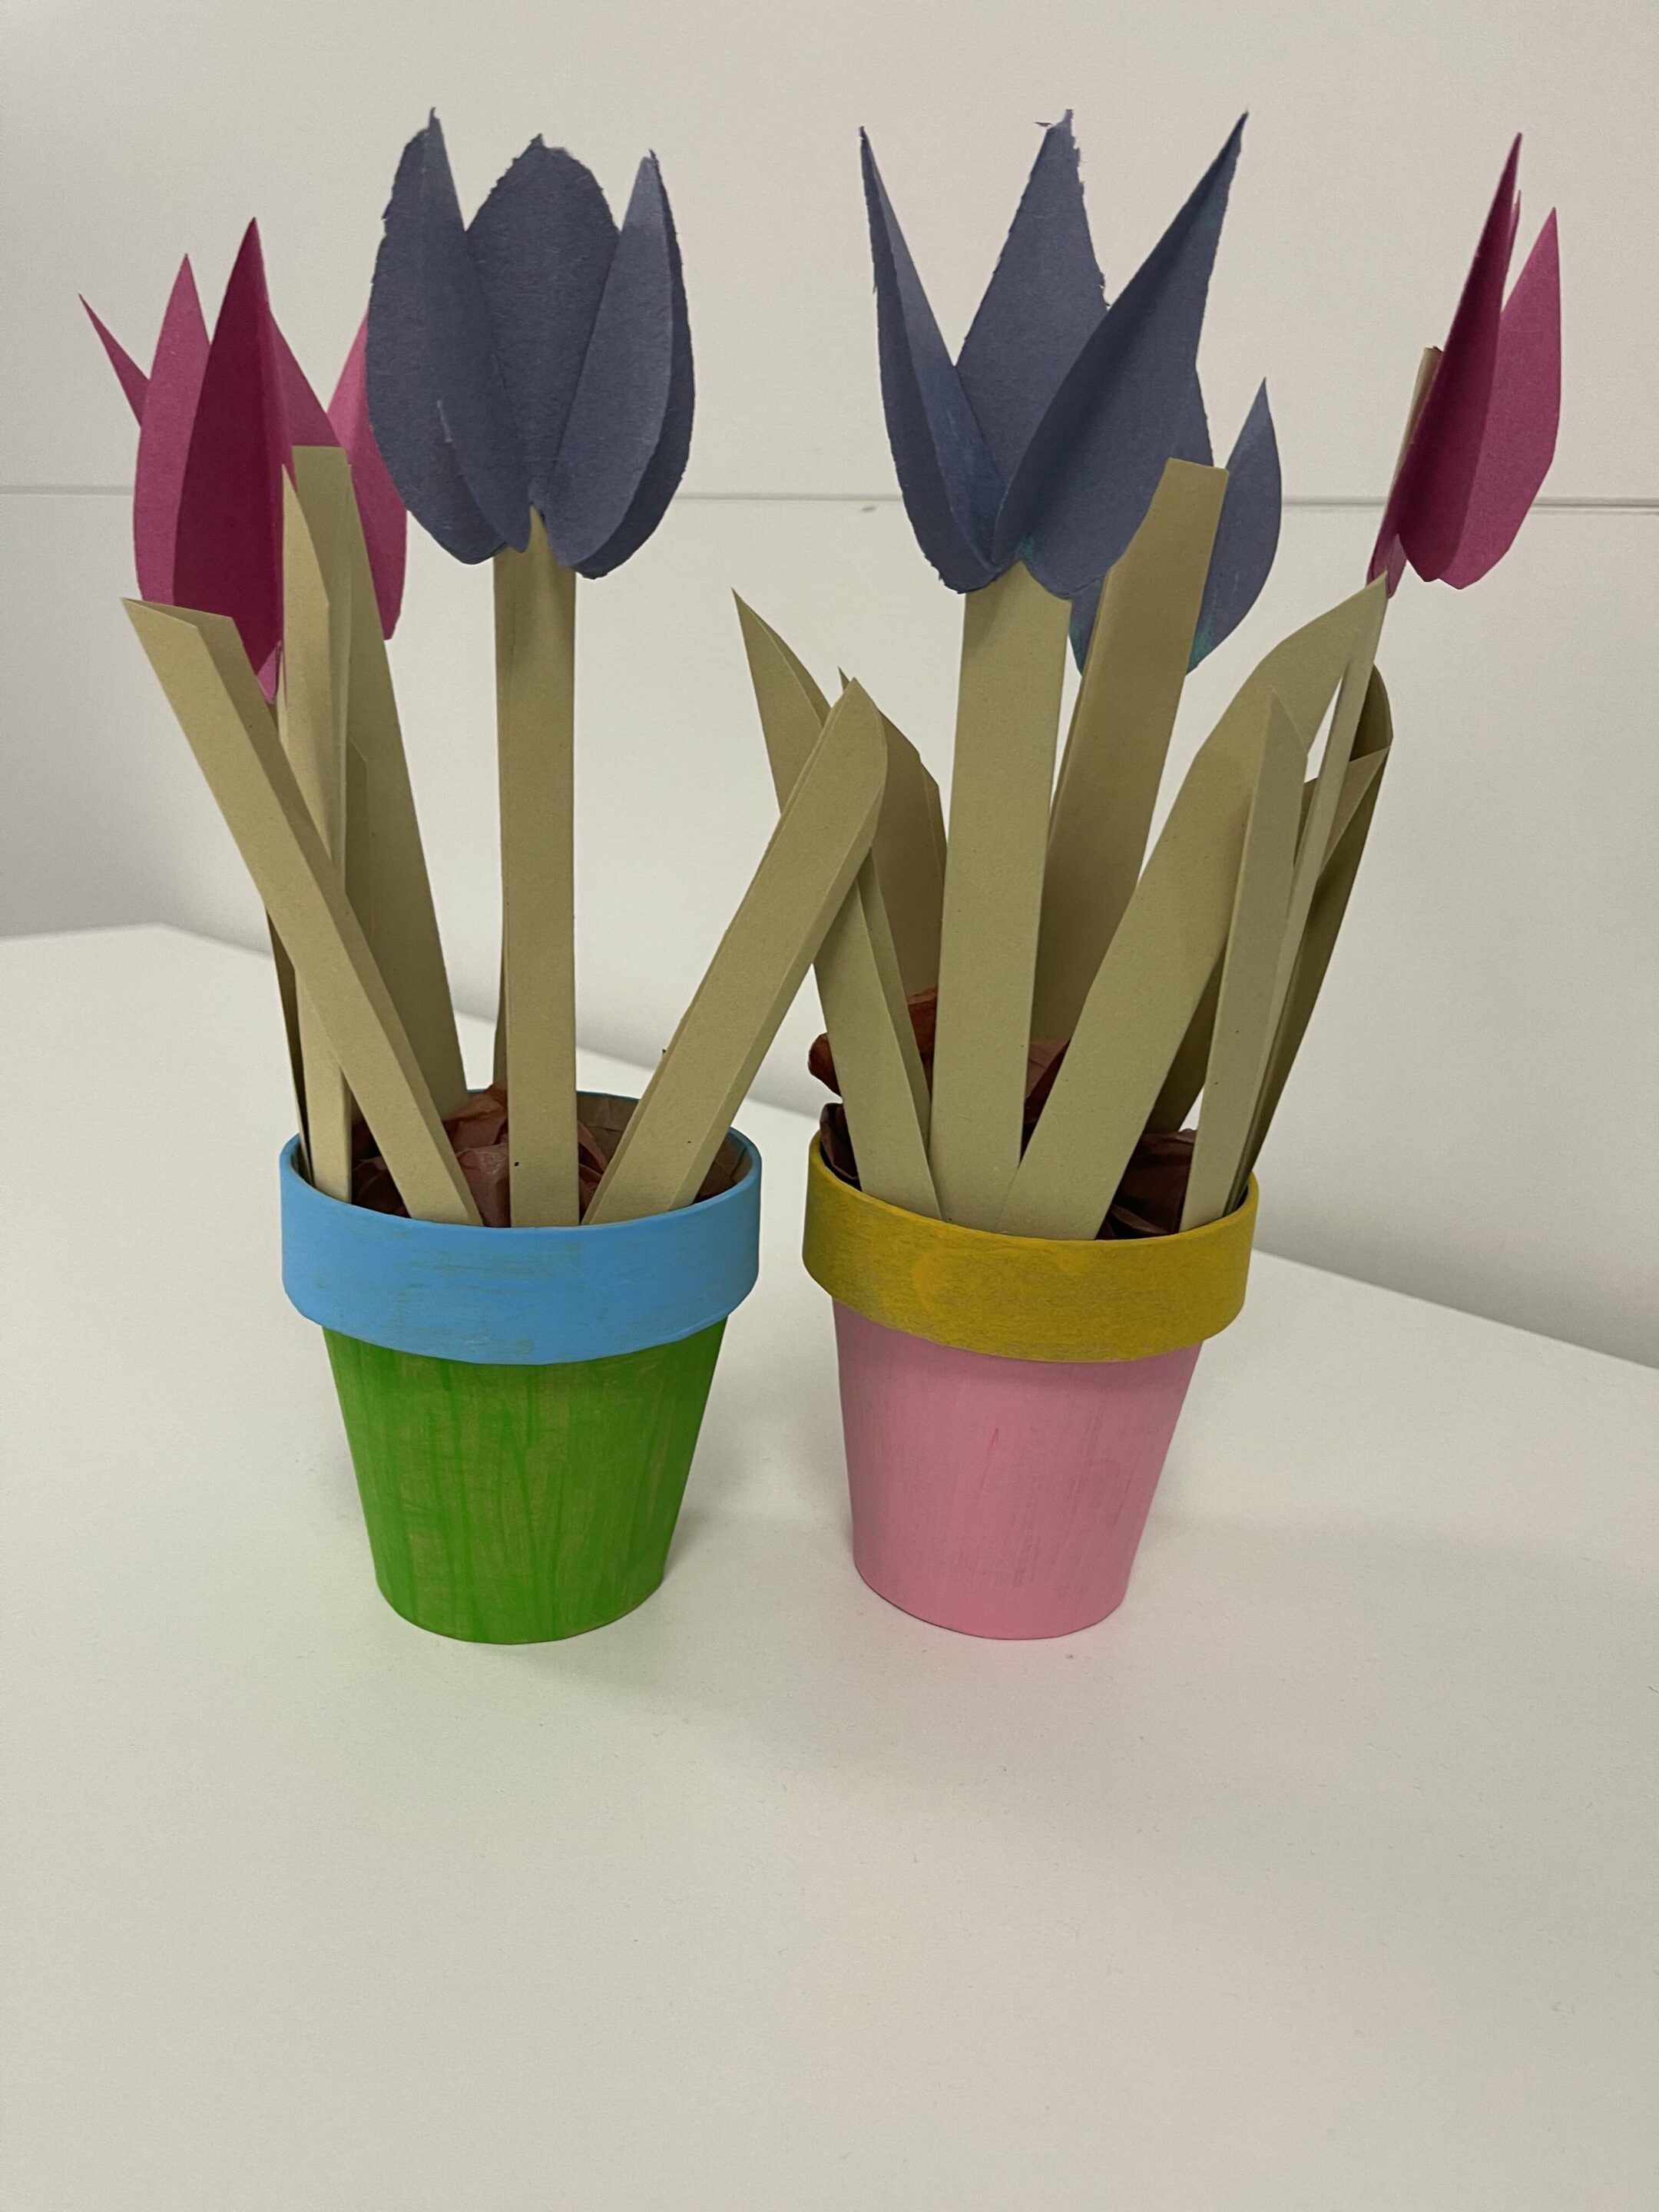
Decorate Your Own Flower Pots
Now here’s an activity that’s just blooming with creativity!
Decorating flowerpots and crafting paper flowers is a wonderful way to introduce young children to gardening and plant care.
Read our step-by-step tutorial below to guide you through the process of transforming papier-mache flower pots into colourful masterpieces, alongside colourful paper flowers that will brighten up any space.
What you’ll need:
- Decorate Your Own Flowerpots
- Coloured Sugar Paper
- Paint
- Paintbrush
- Glue
- Scissors
- Optional – various decorations
Step 1
Paint a flowerpot using colours of your choice.
Step 2
Whilst the paint is drying, get started o the flowers. Start off by cutting around 4inches of sugar paper into a rectangle.
Step 3
Then fold one side then the other side on top. Then fold vertically.
Step 4
Using a pen, lightly draw a petal shape onto the folded paper.
Step 5
Next, cut out your petal shape using a pair of scissors. You should then be left with 3 individual petals.
Step 6
Put some glue at the bottom of one of the petals.
Step 7
Fold over the two remaining petals and stick them onto either side of the petal with glue on.
Step 8
Now cut some pieces of green paper into a 4inch rectangle. This will be the stems and leaves.
Step 9
Fold one piece of paper over a few times to make a thinner shape. Then glue the flap down.
Step 10
Using another piece, cut a diagonal triangle off at the bottom, but curve up and keep cutting until you get to the top.
Step 11
Now glue your petal onto your stem and your leaves on the bottom of each side of your stem.
Step 12
Add some crumpled brown tissue paper into your flower pot and then add your beautiful flowers!
We would love to see the final result, so make sure to tag us on Instagram!
We’ve got lots more summer crafts to try out. Check out our Paper Plate Rainbow and have a go.