Multilink® Christmas activities
To get in the Christmas spirit, why not combine crucial subjects with creating fun festive models using Multilink®?
We explore different Multilink® models you can create with your class that are suitable for all ages. From early years to KS2, get pupils learning maths in a creative and engaging with our Multilink® Christmas activities.
EYFS
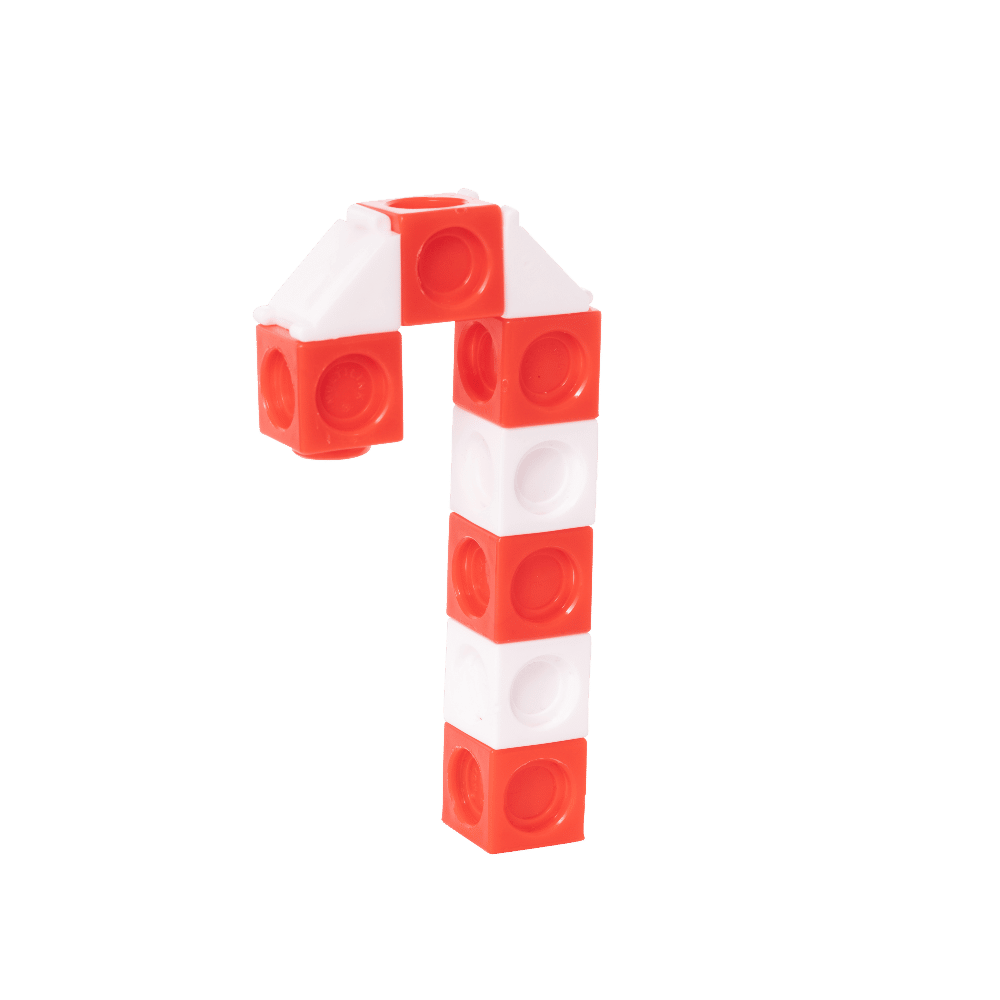
Maths has never been so magical! For a fun and festive Early Years activity, have a go at making these marvellous Multilink® candy canes. This lesson will build children’s mathematic understanding of simple repeating patterns whilst developing their fine motor skills.
Step one
To begin, organise your group of pupils into pairs. Provide each pair with 4 red and 4 white cubes. See if the pair can work collaboratively to create one repeating pattern stick (white, red, white, red, white, red, white, red). Can the children count how many cubes are in their stick altogether? (8!).
Step two
Next, ask the partners to break their repeating pattern stick in half, sharing it between themselves equally. Each of them will now have a short repeating pattern stick of 4 cubes (white, red, white, red). This is a great time to mention the concept of number bonds and the idea of ‘parts’ and a ‘whole’, reminding the children that 4+4=8 whilst 8-4=4.
Step three
After that, pupils should put their short repeating pattern sticks to one side. Now, provide each child with 3 more red cubes and 2 white isos pieces. With these, your pupils should work independently to make a curved bridge shape (which will form the top part of the candy cane). This might be a bit tricky, so provide children with support and guidance where necessary.
Step four
Finally, each pupil should click and connect the curved bridge shape to the top of their repeating pattern stick (joining red cube to white cube to ensure that the pattern isn’t broken). Now, everyone should have their completed Christmas candy canes! You can even surprise children with our candy cane hanging ornaments they can decorate and take home!

Key Stage 1
Are you pining for a great activity? Bring a Christmas tree to your classroom with Multilink®! Perfect for Key Stage 1, this session can be linked to science, supporting children’s understanding of different types of plants, their structures and what they need to survive.
Step one
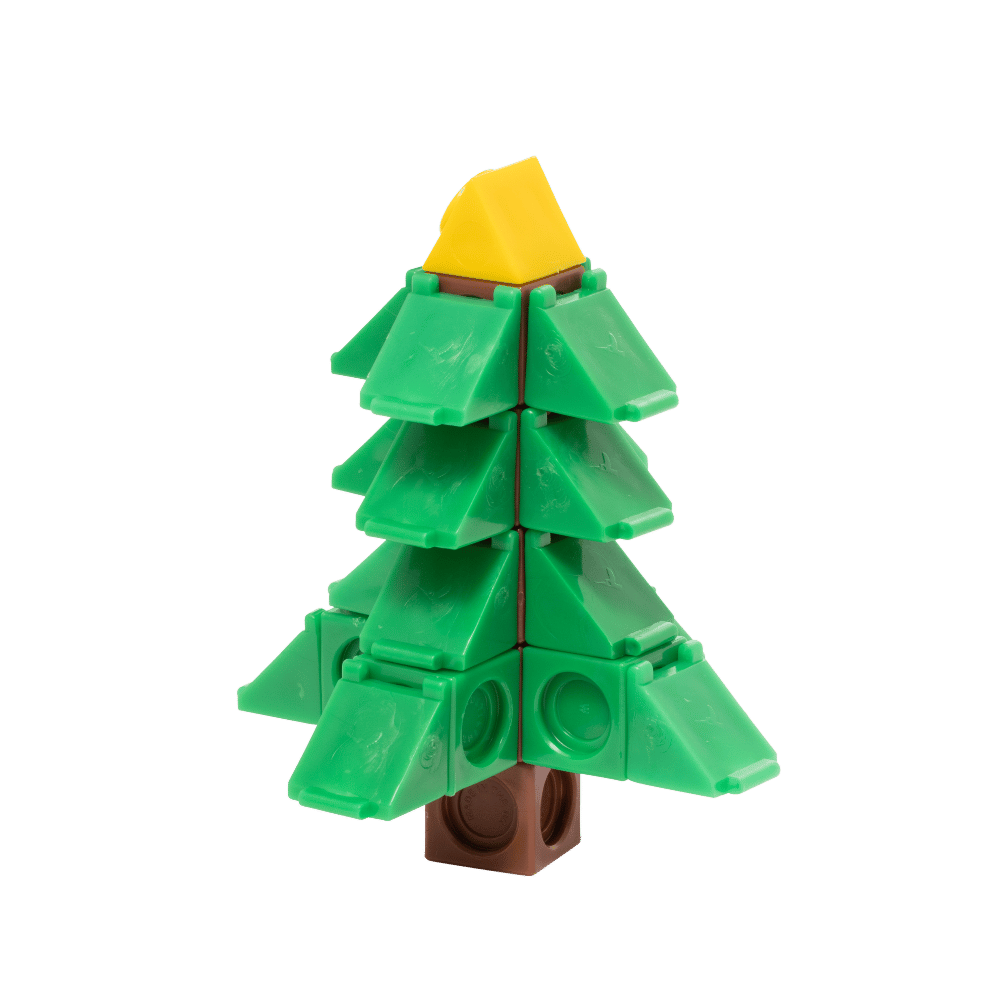
First, arrange your class into small, mixed ability groups. Provide each group with 5 brown cubes, asking them to make a simple stick. Which part of a tree do your pupils think this section might form? (The trunk).
Step two
Next, give each group 4 green cubes and 16 green isos pieces. Using the Multilink® model Christmas tree image as a guide, the pupils should work together collaboratively to click and connect these pieces around the sides of the brown trunk. Now, their tree is complete with pine needle leaves!
Step three
Finally, the pupils simply need to add a single yellow prism to the very top of their Christmas tree, representing a shining star. Can the children think of any other tree parts which aren’t visible on their models? (Branches and roots).
Extra activity
At this point, ask your class to consider the appearance of their Multilink® Christmas trees (and their own Christmas trees at home). Have them compare it to other trees around your school, such as birch, oak or sycamore trees. What differences can your pupils spot? While deciduous trees lose their leaves in autumn and have no leaves by winter, Christmas trees keep their leaves all year round! Explain that this is because Christmas trees are evergreen trees, such as pine, fir or spruce trees.
To finish, discuss some different things that all plants need to survive (e.g. light, water, soil and a suitable temperature), explaining that if a plant does not get these things, it will die. On this note, give the children a chance to break apart their Christmas tree creations!

LKS2
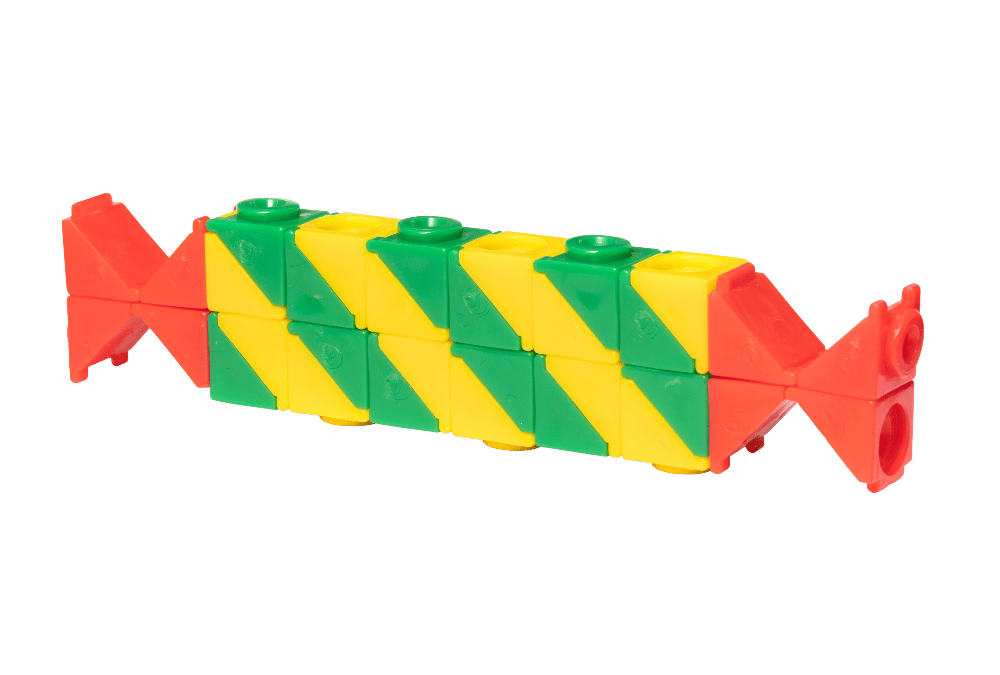
For an activity with a bang, have a go at creating these fantastic Christmas crackers, made entirely out of Multilink®! This seasonal yet simple session provides an exciting opportunity to explore and investigate the scientific concept of sound, particularly useful for learners in Year 4.
Step one
To begin, organise your class into mixed ability partners. Provide each pair with 12 green and 12 yellow isos pieces, but don’t reveal to them what they’re making just yet! First, ask the children to click and connect every green isos piece to a yellow isos piece, creating a total of 12 separate cubes which appear to be half green and half yellow.
Step two
Next, the pupils should join 6 of these cubes together, ensuring that green connects to green and yellow connects to yellow, creating the appearance of a stripy stick! Repeat this step with the other 6 cubes, creating a second stripy stick. Now, the children need to stick one of these sticks on top of the other horizontally, again making sure that green connects to green and yellow connects to yellow.
Step three
Finally, give each pair 8 red isos pieces. Taking two at a time, the pupils should click these together to make 4 red triangular prisms. These then need to be connected into 2 red bowtie shapes and fixed to either end of the large stripy stick. Can any of your class figure out what they’ve made?
Step four
At this point, reveal the completed Multilink® model Christmas cracker image and give each pair the chance to fix any mistakes in their models.
Extra activity
After creating the cracker model, reveal a box of real Christmas crackers or make your own as a class! Explain that you are going to investigate the relationship between the volume of a sound and your distance from its source.
Give each pair their own Christmas cracker, allowing them to pull it open together. How would your pupils describe the volume of the sound when they are very close to the source? (Loud).
Next, ask for two helpful volunteers to stand at the front and pull apart a cracker while the rest of the class stands at the back of the classroom. Now that the children are further away from the source of the sound, how did its volume compare?
Finally, take the class into your school hall. Ask for two more volunteers to stand at one side of the hall and pull apart another cracker while the rest of the class stand at the opposite side. When the pupils are even further from the sound source, what was its volume like? (Quiet).

UKS2
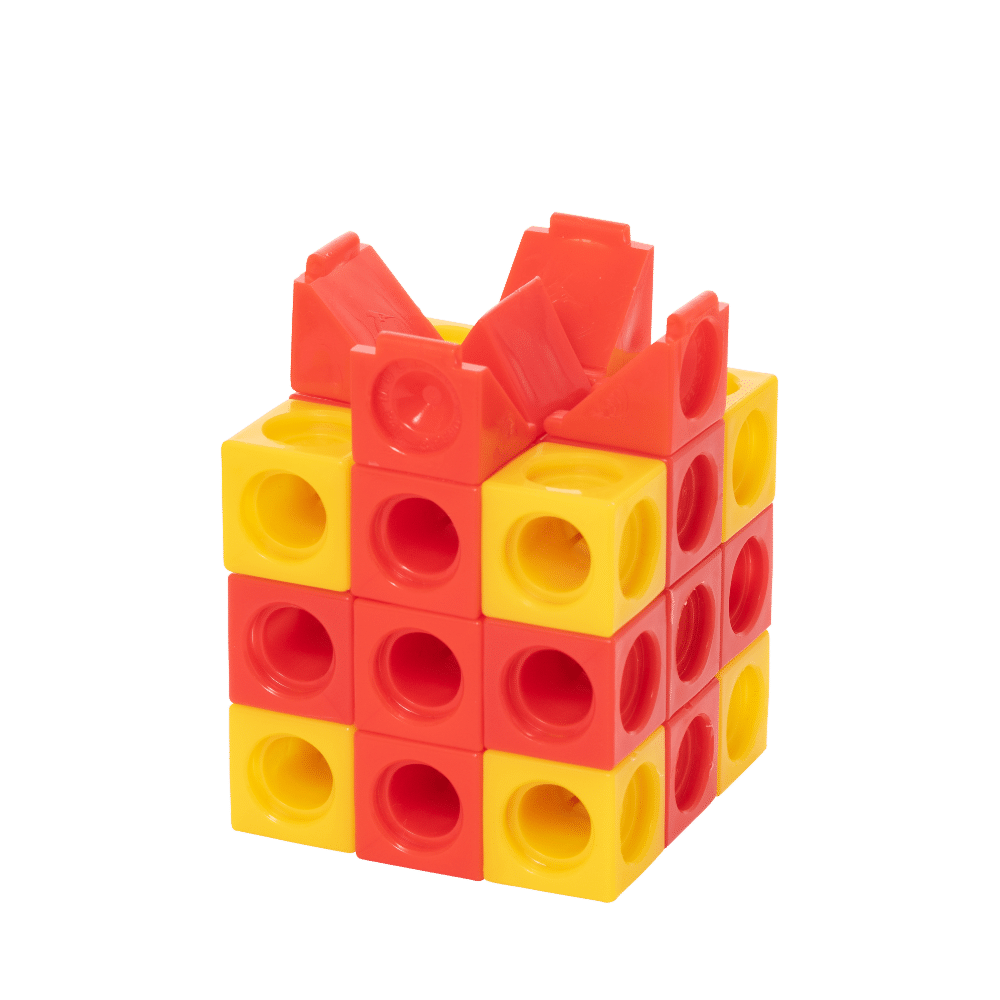
The best gifts come in cube shaped packages! Making these merry Multilink® presents is a brilliant way to combine Christmas fun and mathematic learning. This activity will develop understanding about cube numbers, making it fantastic for learners in Year 5.
Step one
First, arrange your class into small, mixed ability groups. Remind your class that when we multiply a number by itself, and then by itself again, we get a cube number. Ask each group to demonstrate this calculation on a whiteboard, for example the number 1 will be wrote as 1 x 1 x 1. What would this equal?
Step two
Once the pupils have agreed that 1 x 1 x 1 = 1 (1 cubed), provide every group with a single red Multilink® cube to represent the cube number 1. Next, give each group some more red cubes, so they now have a total of 8. Challenge the children to make another larger cube number with their Multilink®. They should write the corresponding calculation on their whiteboards, which should be 2 x 2 x 2 = 8 (2 cubed). Repeat this process a final time with 27 red cubes, representing and writing the calculation 3 x 3 x 3 = 27 (3 cubed)! Can any of the pupils figure out what the next cube number in this pattern would be?
Step three
Next, explain to your pupils that they are now going to use the cube number 27 (3 cubed) to construct a Multilink® model of a Christmas present! In total, every group will now need 19 red cubes and 8 yellow cubes, as well as 4 red isos pieces and 1 red prism piece. Using the Multilink® model Christmas present image as a guide, each group should work together collaboratively to create their own version of the present. The easiest way to do this is to begin by creating a flat square of 9 red cubes.
Step four
Next, the children should construct two more flat squares which both consist of 5 red cubes and 4 yellow cubes, creating the appearance of a red cross on a yellow background. Then, these three flat squares must be joined together, making a cube of 27.
Step five
Finally, the pupils simply need to click and connect the 4 red isos pieces and 1 red prism piece to the top of their cube, creating the red bow on top of the present!

Try these festive Multilink® models and get children excited about learning whilst developing their knowledge. For more Multilink® fun, check out our 14 ways to use Multilink® in your classroom blog.